


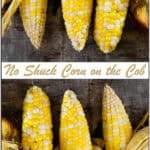


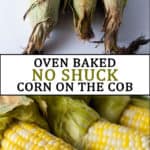
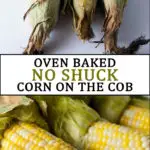
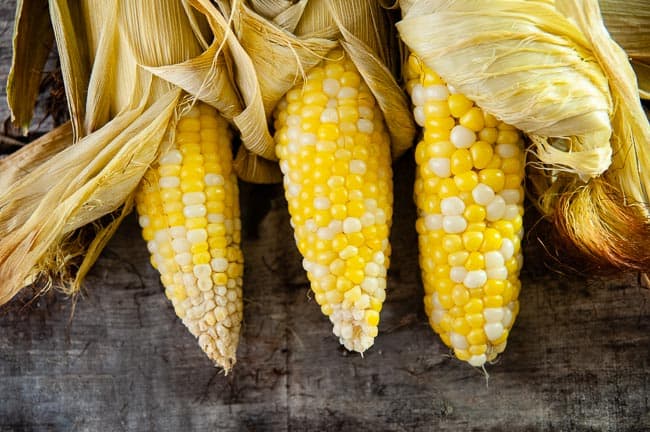
Easy baked corn on the cob is the fastest and most delicious way to make this summer staple without needing to shuck the corn first. Just pop the ear – corn husk and all – in the oven and bake for the perfect side dish for any summer meal.

Post may contain affiliate links. As a member of the Amazon affiliate program, I may earn a small commision from qualifying purchases. To read my affiliate policy, click here.
It’s corn on the cob season!
Meaning: every grocery store will set up a make shift shucking station.
Every time I go to the store, I see customers shucking. Right there, in front of everyone.
For all you grocery store shuckers, there’s an easier, tastier way to cook your corn on the cob.
Don’t go shucking with no strangers.
Instead, keep the corn in the husk and pop it right in the oven or fired up grill.
The end result is a juicer corn that maintains more of the flavor.
As an added bonus, the corn is a lot easier to shuck once it has cooked!
Baked corn on the cob works great when it maintains its integrity, so don’t you dare shuck it before its ready.
Stop Shucking Your Raw Corn- For Shuck’s Sake!


We don’t shuck our corn until it is ready to eat.
We wait until the corn is cooked to shuck it.
Why you might ask, especially when shucking in public is so common?
- Shucking raw corn is a pain.
- Baking corn on the cob within its own husk cooks it in its own juices, keeping extra sweetness in.B
- Baked corn is easy to shuck.
- We’re sure it tastes better. (This is subjective and subject to credit approval.)
Let’s talk about how hard shucking raw corn is.
You have to peel out tough little string-like fibers.
You have a firm husk fighting against you.
And if you do it in a grocery store, people watch as you shuck that corn.
But…
Baked corn on the cob causes the husk to become easier to pull apart.
The fibery strings become easier to pull out too.
Suddenly shucking is easy.
The bottom line: backed corn on the cob is shucking made easy.
Ingredients and kitchen tools
Baked corn on the cob requires almost nothing to make it delicious.
Here’s the shopping list:
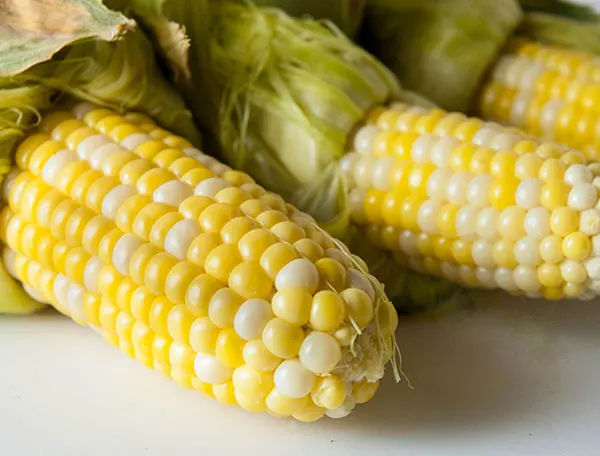
- Corn on the cob: You want to just grab as many ears of corn you need. Leave the husk on and by pass all those shucking losers doing it in front of everyone.
- Optional ingredients: If you want, you can add butter, salt, pepper, or other sprinkled on flavors. We ratherly do because the corn typically comes out without needing anything extra, but for the most part, you probably have the extras on-hand already.
You really do not need anything special to make baked corn on the cob.
But if you feel so inclined, you may want to pick up:
How to cook corn on the cob in the oven
We have a few other simple rules when it comes to preparing this summer side dish:
- Don’t boil the cob
- Don’t – in the name of all things holy – wrap the cob in clear plastic wrap and microwave it. Just. Don’t.
To bake corn on the cob in the oven, follow these easy steps:
1. Preheat the oven to 400 degrees
Set your oven to 400 degrees and let it heat up.
2. Place the corn in the oven
Once the oven comes up to temperature, place the corn in the oven.
You can use a tray if you like, or you can place corn on the cob directly on the oven racks.
Placing a tray under the corn helps keep any of the husk from burning and making a mess in the oven.
3. Remove the corn and husk it
After 20 minutes, remove the corn on the cob from the oven.
Set it down to cool for about 5 minutes or until you can handle the outside safely.
Carefully shuck the corn.
It will likely be steaming so watch your fingers.
How to make roasted corn on the cob on the grill
You can make roasted corn the cob on the grill very easily.
The steps are similar to making corn in the oven.
1. Preheat your grill
If you use a gas grill, set it so it comes up to 400 degrees.
If you are using charcoal, you will want to get the fire to about 400 degrees.
In either case, set your grill so you can place the corn not directly over the heat.
This can help prevent burning the husk.
When we have placed it over direct heat in the past, we have managed to burn right through the husk and char the kernels.
2. Roast the corn in the husk
Once your grill is ready, place the corn in the husk on the grill over indirect heat.
If you can’t help putting the corn over direct heat, you will want to flip the corn every few minutes to help prevent burning.
Roast the corn on the cob for 20 minutes.
3. Remove from the grill and shuck the corn
Use tongs to carefully remove the corn from the grill.
Let it rest for about 5 minutes or until you can safely handle the outside of the husk.
Shuck the corn and serve with your grilling favorites, like stuffed burgers.
Why is roasted corn so delicious?

Ok, here’s the deal.
Roasting makes veggies way more delicious, which is why these roasted brussels sprouts and this garlic roasted green bean recipe is so good.
It’s science.
This method of cooking brings out the natural sugars in the corn thanks to caramelization.
When caramelization, happens new aromatic compounds form.
This means your corn will be extra delicious and sweet even if it is not fresh picked, which – let’s face it – most grocery store corn on the cob is not exactly the freshest.
Storing baked corn on the cob
Storing baked corn on the cob is possible, though we generally recommend eating it fresh.
To store, shuck the baked corn on the cob.
You can either wrap it in plastic wrap or place in an airtight container.
It should store well for about 2 to 3 days.
If you plan to use it for a soup, like corn chowder, you use a sharp knife to remove the kernels before storing.
Tips and tricks for baked corn on the cob
Here are some tips and tricks when you make baked corn on the cob:
- Preheat your oven so it cooks evenly in about 20 minutes.
- Do not shuck your corn before baking it. The husk helps to lock in the juices, producing a sweeter and tasty version of corn on the cob.
- Let the baked corn on the cob rest for about 5 minutes before shucking it. It will be hot and steamy on the inside, so watch your fingers as you shuck it.
What to serve with baked corn on the cob


Corn on the cob is the unofficial side dish of summer. It pairs well with almost any barbecue main like:
- Pineapple Barbecue Burgers
- Bacon Cheddar Stuffed Burgers
- Jalapeno Popper Burgers
- Instant Pot Barbecue Chicken
- Coffee Rubbed Ribs
- Beer Barbecue Ribs
You can also cut the cooked kernels off for soups and salads like these:
And have you thought about serving it with tacos? We do that all the time to round out taco night! You could also throw some in this fresh salsa recipe.
And for a truly creative and delicious way to serve corn, try it in pasta like this summer harvest pasta.
What’s your favorite thing to serve corn on the cob with? Leave me a comment and let me know!
Did you make this roasted corn on the cob recipe? Comment below or tag me on Instagram or Facebook @seasonedsprinkles and let me know what you thought!


Ingredients
- Corn on the cob
To Finish (optional):
- Butter
- Salt
- Pepper
- Parm cheese
Instructions
- Preheat oven to 400 or set grill to medium high or create hot fire with charcoal.
- Cook for about 20 minutes or until the corn husk starts to look brown/grey all over.
- Let sit for about 5 minutes
- Carefully peel away husk, it will be hot!
- Top with favorite toppings such as butter, salt and pepper, and/or cheese.
[…] times, like when we made the easy baked corn, she gets a little […]
[…] But I have a kid. A cute, lovable kid. […]
[…] of my favorite things to eat this time of year is corn on on the cob. It’s so easy to make and total toddler crack. I mean seriously? Have you ever given a […]
We love corn on the cob, especially my daughter. This seems like an easy way to make it.
So easy! What is it about kids and corn??
We love corn and I didn’t know I could simply throw it in the oven …I’m not one to grill, so now that I know I can bake it..I’m going to go purchase some corn and cook it this way. Yummm!! Thanks for sharing 🙂
So easy! We’ve been doing it this way for ages. Beats shucking those husks and tastes delish!
Fantastic idea! We grill corn but never in the husk. We’ll try it this weekend!
We grill it too. We almost always leave the husk on when we grill it. Tastes great, less work 🙂
This couldn’t be more perfect timing! I have a couple of cobs in the fridge and have NEVER prepared them before so I was wondering what the best method would be. Thanks!
Omg, really? Never?? I hope it turns out well for you!
WHAT?! I have never heard of baking corn before. This is genius! I hate shucking.
It is the shucking worst. 🙂
So yummy! Love this! Corn reminds me of my mom and childhood. Such a fun summertime food.
Yes. So glad you wrote this post. We always grill our corn with husk on. Always. Turns out so good!
Right?? It’s the best. So many people think we are nuts until they taste it!
Your corn model is adorable!!! I love corn on the cob…such a summer staple.
Thanks! We think we’ll keep her 🙂